Arm Before and After Photos: A Slimmed Arm Is Not a Treated Arm
Search for arm before-and-after photos and they pour out. What does not come through is that those pictures are results of different methods.
Arms changed by weight loss, arms that had injections, and arms that had surgery all sit on the same screen. The three produce changes that differ in shape and in speed. Not knowing which one you are looking at means your expectations are off from the start.
Three kinds of photo are mixed together
Let us separate them first. Arm before-and-after photos come from three branches.
Weight-loss photos are the most numerous — posted with a note about how many kilos came off. It is not only the arm that changed; the face, the shoulder line, the whole body has shifted with it.
Injection photos are usually close-ups of one spot — a single zone at the back of the arm, or the front of the armpit — and often come with a session count.
Surgical photos capture the whole arm, or a range including the armpit. They are often shot in a specified position, and sometimes the time point is stated.
The three address different things. Weight loss addresses overall body fat, injections address a narrow area of the shallow layer, and suction addresses a broad area along the layers. Different targets necessarily produce different changes in a photograph.
How does a slimmed arm differ from a treated one?
Both are “a thinner arm,” but they read differently.
An arm changed by weight loss
Because fat came off everywhere, the arm does not change on its own. The photograph shows a changed facial contour and shoulder line along with it.
And since the order in which the arm gives up fat is set individually, it is common for the weight to come down considerably and the back of the arm to remain. Those photographs show a small change at the arm. Look only at the weight-loss photos with dramatic arm changes and your expectations run ahead of reality.
Where the loss was rapid, the skin does not keep up, and there is a period of looking thinner but looser. A photo taken then and one taken after things settle give different impressions.
An arm changed by injections
The area is narrow, so only that spot changes. A bulge at the front of the armpit, one point at the back of the arm — and the photograph is a close-up of that zone.
Because it is delivered over sessions, it takes time. A photo taken right after the last session still has swelling in it and differs from one taken two months later.
It is not a method that changes the line of the whole arm, so a full-arm photograph often shows little.
An arm changed by surgery
Because it works broadly along the layers, the distribution changes. What protruded comes down; what was hollow stays. So the change appears first in the line seen from the side rather than in a circumference measurement.
It needs time in exchange. Sleeve fit changes from around week three, but the arm-raised view requires the skin to settle and takes close to three months. A one-month photo and a three-month photo tell different stories.

Five things to check when looking at photos
Worth confirming before you read anything into a before-and-after.
| What to check | Why it matters | Without it |
|---|---|---|
| Did the weight move too? | Weight loss may be mixed in | You credit the procedure too much |
| When it was taken | Swelling may still be present | You read a mid-recovery view as final |
| Angle and distance | Angle changes apparent thickness | You read setup as result |
| Lighting | Shadows create lines | Contours appear that are not there |
| Position | Pressed against the body, an arm looks wider | The same arm photographs differently |
The first row is what people miss most. In a great many reviews, the sentence about losing several centimeters of circumference is followed immediately by one about losing several kilos over the same period. The writer is not hiding anything — they did both. But unless the reader separates them, the method gets credited with more than its share.
The last row matters a lot too. Press the arm against the body and it flattens outward and looks wider; float it slightly and the same area reads tidier. A before-and-after shot in two different positions differs on that alone.
How to record your own photos
If you are planning surgery or a procedure, build your own baseline first.
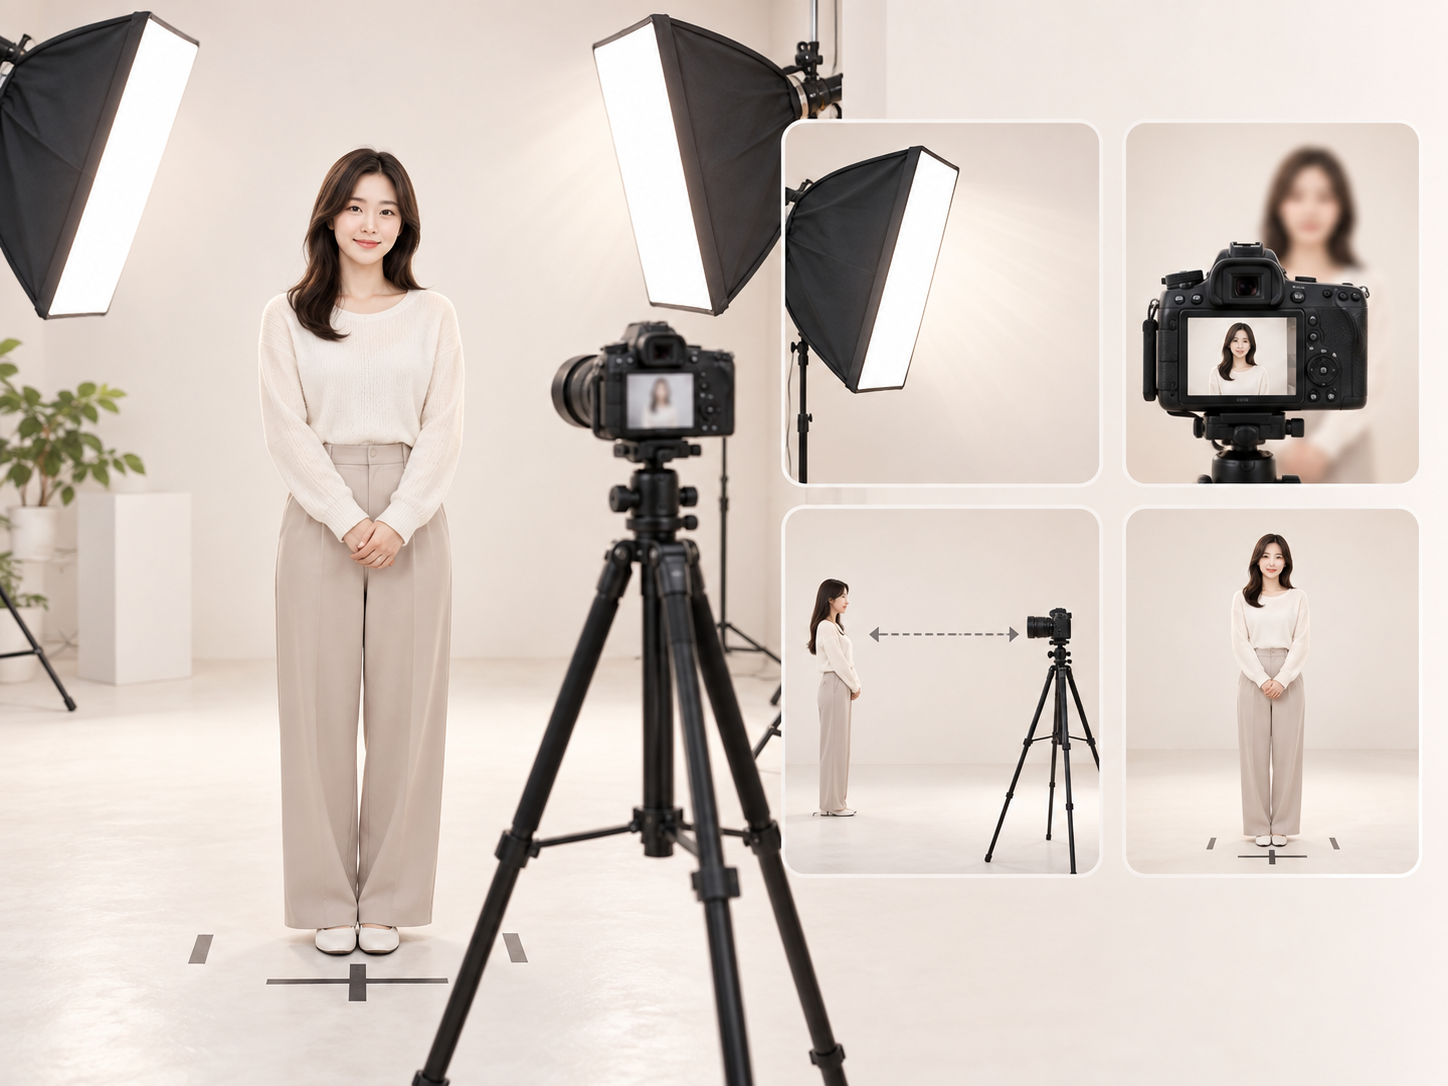
Fix the conditions. Same place, same lighting, same distance. Stand a step out from the wall and set the camera at your own height. Shooting down at yourself makes the arm look thicker than it is.
Record four positions. Front with arms down, profile with arms down, arms held slightly away, and arms raised. The arm changes shape dramatically with position, so one photo will not settle anything.
Shoot every two weeks. Daily mirror checks let your eye adapt and you miss the gradual change. Two-week intervals side by side show the direction.
Note your weight alongside them. It becomes useful later when separating what came from what. Your comparison is not someone else’s three-month mark — it is your own two-week mark.
One more thing about surgical before-and-afters
A photo with no time point is hard to judge. What is visible changes at every stage of arm recovery, so the same person at one month and at three months can look like two different arms.
Right after surgery, anesthetic fluid and early swelling actually make the arm photograph larger. Between weeks two and three the major swelling comes down and the numbers drop, and residual swelling settles slowly after that. Sleeve fit changes first, the side silhouette with the arm down comes next, and the arm-raised view arrives last.
So if a photo labeled “one month” shows a fully settled arm-raised view, it may be a case where the skin had good elasticity to begin with, or where there was not much to remove. Take that as the standard for your own one-month mark and disappointment is likely.
If there is no time point, keep the photo as reference only. A result with no date attached cannot serve as a basis for comparison.
Sometimes the time point appears in the comments or caption, so it is worth reading those. If not, you can look through the post for the surgery date and the posting date and work it out.
Will my arm change the same way?
This question is the real reason anyone looks at these photos.
Even with the same method, the range of results differs from person to person — how much fat sits in which layer, what the skin elasticity is, how fast recovery goes. So rather than the size of the change in the photo, it is more meaningful to look at whether that person’s starting conditions resemble yours.
There are clues. Whether the thickness at the back of the arm in the pre-op photo looks like yours, whether the amount it moves when raised looks similar, whether any weight-loss history is mentioned.
And a thinner arm is not always a better result. Reduce the fat too far and muscle contours stand out or loose skin shows more. The most-reduced arm in a photo may not be the arm you want. The things to look at in assessing your own arm are set out in what to check before arm liposuction.
The conditions under which taking more makes sagging more likely are covered in what makes an arm more likely to sag. Checking a before-and-after against those conditions makes it much easier to calibrate expectations.
We have not included our own before-and-after photos in this article for the same reason. Even shot under matched conditions, a photo is of limited use when the starting point is different. Reviewing cases with conditions similar to yours in consultation is far more useful.
To sum up: before-and-after photos are reference material, not a projected result. What to examine is not the size of the change but the shooting conditions and that person’s starting point. What is left after subtracting those two is close to the method’s actual share.
There is a limit to how far a photograph can tell you what your own arm will do. How many millimeters the fat layer measures, and whether it sits shallow or deep, only becomes visible once ultrasound separates the layers. That is why a consultation at Line Culture Clinic photographs each position and measures the layers together — so the basis for later comparison exists from the start. If you would like to go through photos and calibrate a realistic range, get in touch.